このページは日本語に翻訳済みです。
outline要素関数要素関数要素関数はsetルールやshowルールでカスタマイズできます。
setルールやshowルールでカスタマイズできます。目次や図表などのアウトライン。
この関数は、指定したdepthまでに登場する要素を文書内から抽出し、その一覧(アウトライン)を生成します。
各要素には、その見出しやキャプションとともに、その要素の番号やページ番号がアウトライン形式で表示されます。
例
#set heading(numbering: "1.")
#outline()

= Introduction
#lorem(5)

= Methods
== Setup
#lorem(10)
見出し以外のアウトライン
デフォルト設定では、この関数は目次(セクション見出しのアウトライン)を生成します。
targetパラメーターを設定することで、見出し以外の要素のアウトラインも生成できます。
下の例では、targetをfigure.where(kind: image)に設定して、画像を含む図のみをアウトライン表示しています。
同様にfigure.where(kind: table)と設定すれば、表のアウトラインを生成できます。
whereセレクターを使わずにfigureのみの指定もできますが、その場合は画像や表、
またその他の素材も含む全ての図表がアウトラインに表示されます。
#outline(
  title: [List of Figures],
  target: figure.where(kind: image),
)

#figure(
  image("tiger.jpg"),
  caption: [A nice figure!],
)
アウトラインのスタイル
基本的に、アウトライン本体やその項目に対してプロパティを設定することでスタイルを変更できます。 これにより、アウトラインのタイトル、項目のインデント、 項目のテキストとページ番号の間の空白の埋め方などをカスタマイズできます。
アウトラインの項目を設定を調整することで、より高度なカスタマイズも可能です。 アウトラインは、対象となる各要素に対して1つの項目を生成します。
項目同士の間隔調整
アウトラインの各項目はブロック要素であるため、通常のブロック間隔設定を用いて、 項目同士の間隔を調整できます。
#show outline.entry.where(
  level: 1
): set block(above: 1.2em)

#outline()

= About ACME Corp.
== History
=== Origins
= Products
== ACME Tools
アウトライン項目の構築
項目の外観を完全に制御するために、outline.entryを変更するshowルールも書けます。
ただし、アウトライン項目を適切に書式設定・インデントするための処理は非常に複雑であり、
アウトライン項目自体が持つフィールドは「レベル」と「対象要素」の2つのみです。
そのため、必要な部分だけを組み合わせて項目を構築できるよう、さまざまな補助関数が提供されています。
アウトライン項目に対する既定のshowルールは次のようになっています1。
#show outline.entry: it => link(
  it.element.location(),
  it.indented(it.prefix(), it.inner()),
)
-
indented関数は、任意のプレフィックスと内部コンテンツを受け取り、 適切なインデントを自動的に適用します。 これにより、異なる項目同士がきれいに揃い、長い見出しも正しく折り返されます。 -
prefix関数は、要素の番号(存在する場合)を整形します。 また、特定の要素には補足語も付加します。 -
inner関数は、要素のbodyとpagenumber、およびそれらの間を埋めるフィラー(点線など)を組み合わせます。
これらの関数を個別に使うことで、アウトライン項目の書式を変更できます。 例えば、フィラーやページ番号を完全に削除したい場合は、次のようなshowルールを書くことができます。
#show outline.entry: it => link(
  it.element.location(),
  // Keep just the body, dropping
  // the fill and the page.
  it.indented(it.prefix(), it.body()),
)

#outline()

= About ACME Corp.
== History

数式のアウトラインはこのルールの例外で、本文を持たないためインデント付きのレイアウトは使用しません。
引数引数引数は関数への入力値です。関数名の後に括弧で囲んで指定します。
outline(,,,)->アウトラインのタイトル。
autoと設定するとtext languageに従ったタイトル名となります。noneと設定すると、タイトルなしとなります。- 独自のタイトルはコンテンツとして設定できます。
アウトライン自体はデフォルトでは見出しとして番号付けされません。
強制的に番号付けしたい場合は、show outline: set heading(numbering: "1.")のようにshow-setルールを使います。
デフォルト値:auto
アウトラインにする要素の種類。
特定の種類の要素(画像や表など)のみを含む図表をアウトライン表示したい場合は、
whereセレクターで目的の種類を指定できます。
詳細は見出し以外のアウトラインのセクションをご参照ください。
例を表示
#outline(
  title: [List of Tables],
  target: figure.where(kind: table),
)

#figure(
  table(
    columns: 4,
    [t], [1], [2], [3],
    [y], [0.3], [0.7], [0.5],
  ),
  caption: [Experiment results],
)
デフォルト値:heading
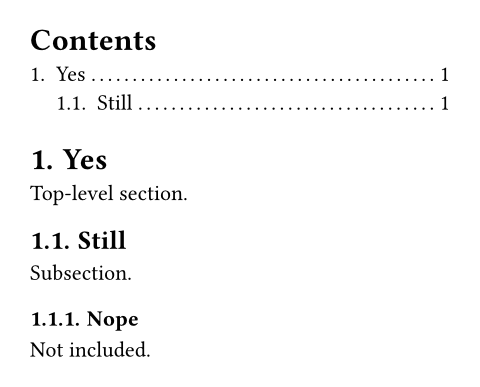
アウトラインに含める要素の最大レベル。
この引数がnoneの場合は、全ての要素が含まれます。
例を表示
#set heading(numbering: "1.")
#outline(depth: 2)

= Yes
Top-level section.

== Still
Subsection.

=== Nope
Not included.
デフォルト値:none
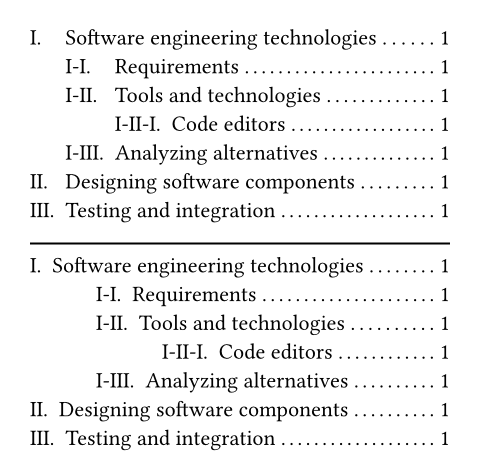
どのようにアウトライン項目をインデントするか。
-
auto: 入れ子になった項目の番号やプレフィックスを、親項目のタイトル位置に揃えてインデントします。 例えば見出しの番号付けで項目が番号付きとしない設定をしている場合には、 レベルに応じて単純に固定幅1.2emのインデントを追加します。 -
相対長さ: ネストレベルごとに指定した長さ分だけインデントします。 具体例として
2emと指定すると、最上位レベル(ネストなし)のインデントは0em、 第2レベル(1段階のネスト)のインデントは2em、第3レベル(2段階のネスト)は4emといった具合に設定されます。 -
関数: 関数を使ってさらに細かくカスタマイズできます。 関数はネストレベルが引数として渡され(最上位要素は0)、相対長さを返します。 例えば
n => n * 2emとすれば単に2emを指定した場合と同じ結果となります。
例を表示
#set heading(numbering: "I-I.")
#set outline(title: none)

#outline()
#line(length: 100%)
#outline(indent: 3em)

= Software engineering technologies
== Requirements
== Tools and technologies
=== Code editors
== Analyzing alternatives
= Designing software components
= Testing and integration
デフォルト値:auto
定義定義これらの関数や型には、関連する定義を持たせることができます。定義にアクセスするには、対象の関数や型の名前を指定した後に、ピリオド区切りで定義名を記述します。
entry要素関数要素関数要素関数はsetルールやshowルールでカスタマイズできます。
entrysetルールやshowルールでカスタマイズできます。アウトライン内の項目。
show-setルールやshowルールをアウトライン項目に適用することで、アウトラインの見た目を柔軟にカスタマイズできます。 詳細はアウトラインのスタイルのセクションをご参照ください。
outline.entry(,,fill:)->level
levelアウトライン項目のネストレベル。
最上位のネストレベルは1から始まります。
element
element例を表示
#set outline.entry(fill: line(length: 100%))
#outline()

= A New Beginning
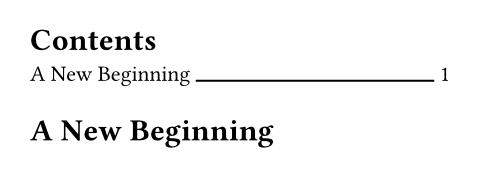
デフォルト値:repeat(body: [.], gap: 0.15em)
entryの定義定義これらの関数や型には、関連する定義を持たせることができます。定義にアクセスするには、対象の関数や型の名前を指定した後に、ピリオド区切りで定義名を記述します。
entryの定義indentedコンテキスト関数コンテキスト関数コンテキスト関数は、コンテキストが既知の場合にのみ使用できます。
indentedインデント付きの項目レイアウトを作成するための補助関数。 プレフィックスと項目本文を、インデントを考慮して配置します。
親アウトラインのindentがautoの場合、レベルNの項目の
内部(inner)コンテンツは、レベルN + 1の項目のプレフィックスに揃えられ、
プレフィックスと内部コンテンツの間には最低でもgap分のスペースが空けられます。
さらに、同じレベルの全ての項目のinnerコンテンツも整列されます。
アウトラインのインデントが固定値または関数に設定されている場合、プレフィックスは
インデントされますが、内部コンテンツはアウトライン全体で整列されるのではなく、
指定されたgap分だけプレフィックスからオフセットされます。
視覚的な説明はoutline.indentを参照してください。
self.indented(,,gap:)->prefixは、レベルが1段低い項目のinnerコンテンツと揃うように配置されます。
デフォルトのshowルールではit.prefix()ですが、自由にカスタマイズできます。
inner
inner項目のフォーマットされた内部コンテンツ。
デフォルトのshowルールではit.inner()ですが、自由にカスタマイズできます。
prefixコンテキスト関数コンテキスト関数コンテキスト関数は、コンテキストが既知の場合にのみ使用できます。
prefix要素の番号付け(存在する場合)の出力形式。
また、図や数式の場合は、通常のアウトラインと同様に要素の補足語も追加します。
例えば、見出しであれば1.1と出力されますが、図であればFigure 1と出力されます。
self.prefix()->innerコンテキスト関数コンテキスト関数コンテキスト関数は、コンテキストが既知の場合にのみ使用できます。
inner項目の規定の内部コンテンツを生成。
これには、本文とフィラー、ページ番号が含まれます。
self.inner()->pageコンテキスト関数コンテキスト関数コンテキスト関数は、コンテキストが既知の場合にのみ使用できます。
page要素の項目のページ番号。 これは参照されるページに対する番号付け設定の書式で出力されます。
self.page()->